It eventually will happen. Something will break on your equipment and leave you with a bench with only two working seats, or maybe only two working benches.
That's why we've put together this resource page to help you find the parts and learn the steps to quickly make the repairs to your equipment.
While these guides may not match your needs exactly, we hope that they will at least help get you pointed in the right direction.
That's why we've put together this resource page to help you find the parts and learn the steps to quickly make the repairs to your equipment.
While these guides may not match your needs exactly, we hope that they will at least help get you pointed in the right direction.
TYPES OF BENCH & Box COnnections
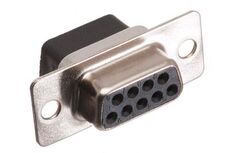
Over the years, there have been more than a handful of unique style connections used to connect the benches to the box. While most have come and gone and are no longer used, there are three main type of benches that remain.
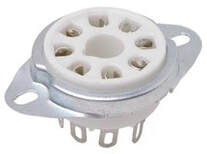
OCTAL: 8 Pin Octal sockets and terminals are the oldest of the three styles still in use and are quickly fading away. These sockets were first designed for vacuum tubes but can be used for a variety of purposes. These sockets and plugs are becoming harder to find however, some older audio equipment, such as amplifiers, are still repaired using these sockets and are sold by enthusiast websites.
Benches and boxes using the octal style connectors will need custom cables made to connect them together. The box and the bench should both use a female socket, while the cord should use male terminals on both ends. The cord itself can be made using any style ethernet cable (we recommend stranded over solid) with the inside wires soldered onto the octal male plug. You can either buy your cable in bulk to create any length cable you would like, or you can go to a local store and buy any ethernet cable and cut off the plastics pieces at the ends.
Depending on the exact style of your benches, the cord for the red bench may need to be wired in reverse order however, this is sometimes handled by the box. *Don't forget to determine your ground!
Resources for replacing and repairing Octal style benches, boxes, and cords.
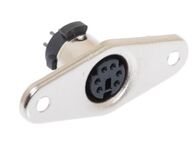
6 PIN MINI DIN | PS/2: While benches with the 6 Pin Mini Din connector are rare (and usually custom made or modified) new boxes almost always come with this style socket.
When your benches and box do not use the same style connector you have three options to choose from to make them compatible with each other.
1. Replace the current or add a second (in parallel) socket on the quiz bench.
2. Replace the current or add a second (in parallel) socket on the quiz box.
3. Create custom cables.
If your box is wired with a 6 Pin Mini DIN Socket and the bench is wired with a different socket or vice versa:
Determine if you want to convert either your box or your benches. Benches are often easier to convert however, at times it may make more sense to convert your box instead. Match the solder points on the new socket with the current socket to make sure you wire the seats/lights to the correct point on the new socket.
or
Determine if you want to create custom cables. This is often the easiest of the three options and can be done with the least number of resources. If either your box or bench has a 6 Pin Mini DIN socket, then the easiest method to create custom cables starts with a male-to-male PS/2 cable.
Once you have the male-to-male PS/2 cable, cut off one end of the cable and reveal the internal wires. Using a multimeter to test continuity, determine which pin on the remaining male end corresponds with each internal wire. Either solder or screw the wires to the corresponding location on the new terminal of your choice.
|
Resources for replacing or adding a socket
|
Resources for matching boxes and benches
|
Resources for making custom cables
|


